
It has been a few days since my last post. Much has happened.
Senior Management and I got the outside walls skinned, filled all of the holes, and put the first layer of epoxy on them. I also put a thin layer of polyurethane on the inside of the walls. The walls are wood and wood expands and contracts according to temperature & moisture. Since I am not at the stage where all of my finish work is done, my side walls and bracing have been expanding and contracting some. From making furniture, I know that if one side of a piece of solid wood is finished and the other side has nothing, it will likely crack. Plywood is more durable but just to be safe, I put a thin layer of polyurethane on the inside of the walls. It has helped with the expansion and contraction issues. Plus, it could be an added moisture barrier.
We skinned the outside since we are using exterior grade plywood (which is rough) and the luan skin is smooth. We chose exterior grade ply because it doesn’t give off nasty gasses. Ironically, the interior plywood does give off those gasses and isn’t good for us to breathe. Since we are building this as a means to escape breathing problems (among many other reasons) it just made sense to use exterior ply. However, one of my neighbors found interior ply that is safe on the Internet. So next time, I’ll use that.
Senior Management and I filled the holes made by my staple gun with Bondo Body filler. Earlier in this process I tried just a simple epoxy based putty (Elmer’s) which is made just for wood. The label said it would take 3 hours to harden. In reality (and in 80 degree weather) it took more like 6 hours. I wanted a fast dry time and Bondo is about 6 minutes. Senior Management used her career skills of making dental fillings and mixed up the Bondo quickly and well. She was really good at it.
On the teardrop forums there has been debate about Bondo and its use on wood. The Bondo Body filler says it can be used on wood, aluminum, concrete, & steel. I also called Bondo and asked the company rep about the product. The only problem that they could foresee was if the wood around the Bondo got wet and swelled. Bondo doesn’t take moisture like wood and it would likely create some damage. Since we’re using fiberglass epoxy as a coating, this wood will never see moisture (I really hope).
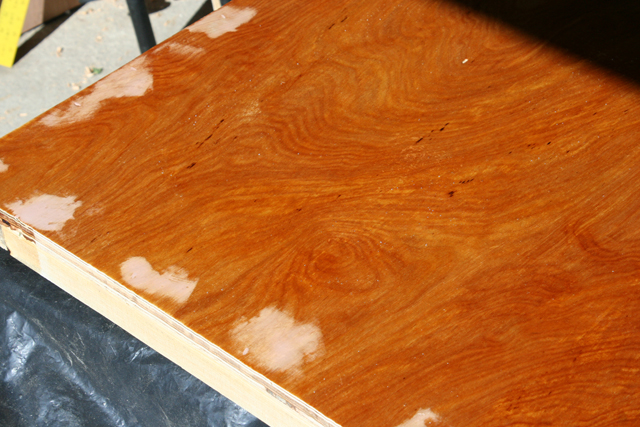
The epoxy was fun. I mixed up a batch and had about 8 minutes to spread it over the entire wall. I learned several things:
- 8 minutes goes fast even when you’re working fast
- epoxy really really stinks
- Don’t always follow the epoxy mixing directions
Once I had the epoxy coating the wall, it quickly started to harden (luckily, I had worked fast enough). However, it also started smoking and was too hot to touch. I think the combination of the hot weather outside and the epoxy mix caused this reaction. As much as I hate my garage and would gleefully roast a marshmallow over it as it burned to the ground, I moved the trailer & curing side out of the garage in case of fire (mostly because my floor grinder is in the garage). I fixed a tarp to the front of my Jeep to keep the curing epoxy in the shade and eventually it cooled off. Next time, I think I won’t put as much hardener in the mix as they recommend and see what that does.
I spread the epoxy (as recommended) with a foam roller. That process was awkward and left some lines to sand out. The roller also pressed some bubbles into the surface of the epoxy. I can sand them without much trouble but I think I’ll try a squeegee next time.
Today, the plan is to do a few more coats of epoxy on the walls and start cutting and building parts in preparation for raising the walls up on the trailer.
After seeing the epoxy on the walls, I can see why some people prefer a natural wood finish for their trailers. It is beautiful (even on luan!).